How to Take Notes on iPad: A Complete Guide
Learning how to take notes on iPad comes down to pairing the right gear with the right software. You need a precision stylus for handwriting and a lightweight keyboard for typing. This combination turns your tablet into a proper notebook replacement — one that's actually easier to organize and search than paper ever was.
Your Essential iPad Note-Taking Toolkit
Before downloading any apps, get your hardware sorted first. The goal is to choose tools that feel natural — accessories that don't get in the way of capturing your thoughts. The right gear is what makes the difference between fighting with your iPad and actually getting work done, whether you're in a fast-paced lecture or a detailed project meeting.
This shift from media device to productivity tool is a big reason for the iPad's popularity. A 2023 study found that 41% of iPad users worldwide use note-taking apps designed for stylus input. People report taking notes up to 30% faster with a quality stylus compared to typing. That's a significant difference when you're trying to keep up with a speaker.
The Stylus: Your Most Important Tool
A quality stylus is the foundation of any good iPad note-taking setup. Tapping the screen with your finger works fine for scrolling, but for writing or sketching, you need precision. This is where a dedicated tool like the Tinymoose Pencil Pro matters. It's designed to feel like a real pen — comfortable for long sessions and responsive enough that you're not thinking about the technology.
When picking a stylus, two features are essential:
- Palm Rejection: This lets you rest your hand on the screen while you write without leaving stray marks. Just like you would on paper. Without it, you're constantly lifting your hand awkwardly or dealing with random lines across your notes.
- Tilt Sensitivity: This changes the thickness of your line based on the angle of the stylus. It's useful for shading, highlighting, or adding emphasis to your notes. Small detail, but it makes your writing feel more natural and expressive.
A stylus without palm rejection is like a pen that constantly smudges. It's frustrating, breaks your concentration, and turns a simple task into something you dread.
The Keyboard: For When Typing Is Faster
Handwriting is great for memory retention and creative brainstorming — research backs this up. But sometimes you just need to type. A physical keyboard is significantly faster and more comfortable than the on-screen version, especially when you're transcribing a meeting or drafting a long document.
A compact keyboard like the SpacePad Pro gives your iPad a laptop-like feel. It's lightweight enough to carry everywhere, portable enough to fit in most bags, and provides the tactile feedback you need for extended typing sessions. The on-screen keyboard eats up half your display and lacks physical keys — a real keyboard solves both problems. For a deeper comparison of different models, check out our guide on the best stylus for iPad in 2026 to see how various options compare.
Finding The Perfect Note-Taking App For Your Workflow
With your stylus and keyboard ready, the next step is finding the right software. The App Store has dozens of note-taking apps, but the key is finding one that matches how you actually work. The best app isn't the one with the most features — it's the one that fits your brain and your routine.
This is a personal choice, and it depends on what you're doing. Are you a student who needs to scribble notes on PDF lecture slides? A professional organizing meeting minutes and action items? A creative who needs a blank canvas for mind-mapping? Each of these situations benefits from a different kind of tool.
This decision tree can help you figure out whether you're primarily a handwriting person or a typing-first person.
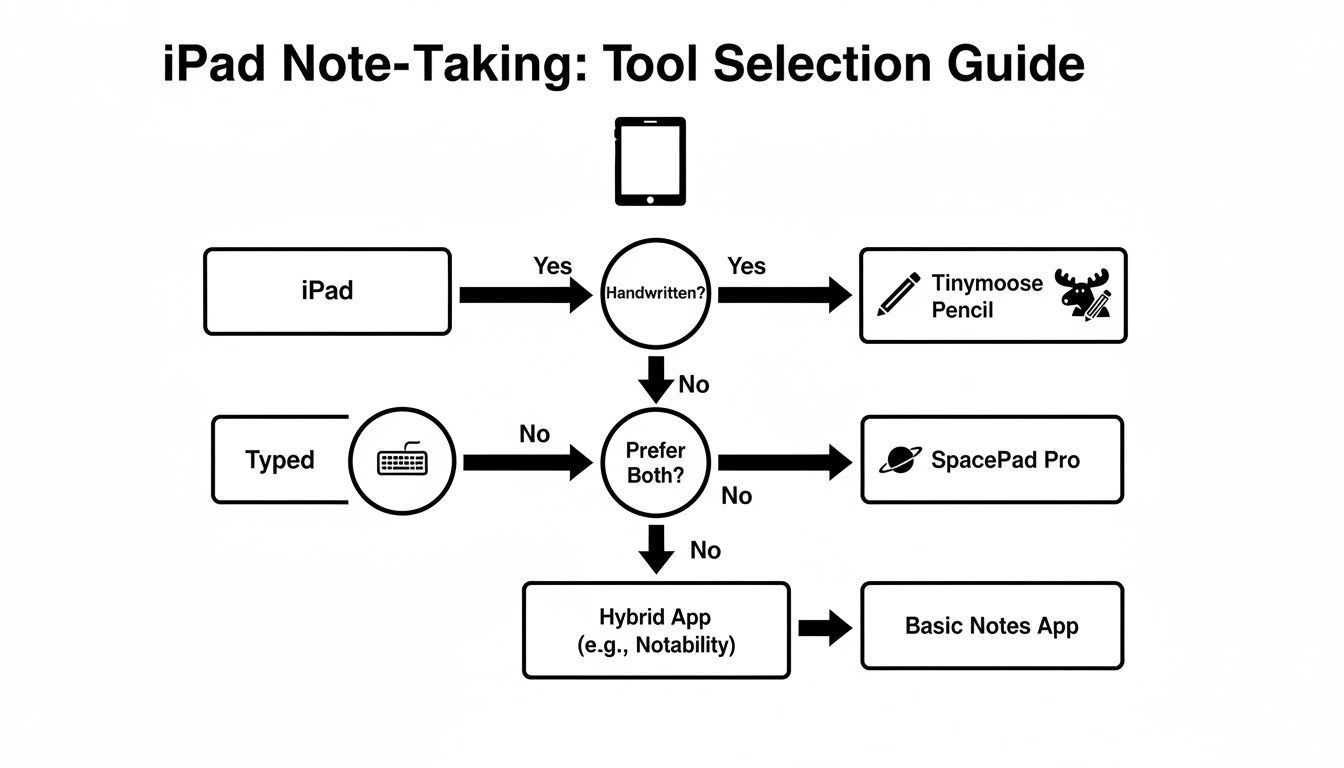
As you can see, it mostly comes down to whether your day-to-day work revolves around a stylus or a keyboard. Most people have a preference, even if they use both.
Handwriting-First Apps
For those who think best with a pen in hand, apps like GoodNotes and Notability are strong choices. They do a good job recreating that pen-on-paper feeling, letting you draw, write, and sketch without constraints. They're well-suited for visual learners, designers, or anyone who finds that the physical act of writing helps lock information into memory.
Where these apps really shine is handling complex documents. You can import a large PDF, mark it up with your stylus, and highlight key sections without ever needing a printer. This is particularly useful for students reviewing textbooks or professionals who need to annotate contracts and reports on the fly. The ability to write directly on documents changes how you interact with them.
Text-Focused Tools
If your workflow is mostly text-based, a more minimalist app like Bear or Simplenote will feel more natural. These apps prioritize speed and simplicity, giving you a clean, distraction-free space to write. They're built for quick capture — jotting down ideas, building outlines, or drafting entire articles without visual clutter getting in the way.
Their organization systems, usually based on tags and folders, are efficient and fast. You can categorize your notes as you create them and find anything you need with a quick search. This structure works well for writers, researchers, and project managers who deal with large volumes of text-based information.
Finding Your Perfect Fit
The best way to choose an app is to actually try a few. Many have free trials, which gives you a chance to see which one fits your daily routine before committing. The global iPad note app market hit $425 million in 2024 and is expected to climb to $561 million by 2031. Much of this growth is driven by demand for handwriting-to-text conversion — the ability to turn scribbled notes into searchable, organized digital text that you can actually find later.
To help you decide, here's how different app types compare on the features that matter most.
Note-Taking App Feature Comparison
| Feature | Handwriting Apps (e.g., GoodNotes) | Text-Based Apps (e.g., Bear) | Hybrid Apps (e.g., Notability) |
|---|---|---|---|
| Stylus Experience | Excellent, closest to real paper | Basic, mainly for simple sketches | Very good, with audio sync |
| PDF Annotation | Core feature, very robust | Not typically supported | Core feature, straightforward to use |
| Organization | Notebooks, folders | Tags, nested folders | Subjects, dividers |
| Typing Experience | Functional, but secondary | Excellent, distraction-free | Good, balances text and ink |
| Handwriting Search | Yes (often a paid feature) | No | Yes (often a paid feature) |
| Audio Recording | Yes (GoodNotes 6) | No | Yes (synced to your notes) |
This table is a starting point, but your personal workflow matters most. What works for a law student won't necessarily work for a graphic designer.
The best setup is one where the features work without you thinking about them. Cloud sync, for example, should just happen — your notes stay updated across iPad, iPhone, and Mac without you manually transferring files or emailing things to yourself.
When you're testing apps, keep these questions in mind:
- Organization: Do you prefer the structure of folders or the flexibility of tags? Some people need rigid categories; others want to cross-reference freely.
- Syncing: How important is it for your notes to appear on all your devices instantly? If you switch between iPad and Mac frequently, this matters a lot.
- Special Features: Do you actually need PDF annotation, audio recording, or searchable handwriting? Or are those features you'd pay for but never use?
For a full breakdown of options, check out our guide on the best iPad note-taking apps. Answering these questions honestly will lead you to an app that doesn't just store your notes, but helps you actually use them.
Take Your Notes From Good to Great
Writing on a digital screen is straightforward. Making those notes genuinely useful weeks or months later — that's where the real value is. Moving beyond basic note-taking is what turns your iPad from a fancy gadget into something that actually improves how you learn and work. A few key techniques make your notes organized, searchable, and far more valuable than scattered handwriting.
It all starts before you write a single word.
Think about it: in the analog world, you'd pick a specific notebook for a specific purpose — lined paper for writing, graph paper for math, a planner for your schedule. You can do the same thing digitally, and with more flexibility. Most serious note-taking apps let you import a PDF or an image to use as the background for your pages. This small feature changes everything.
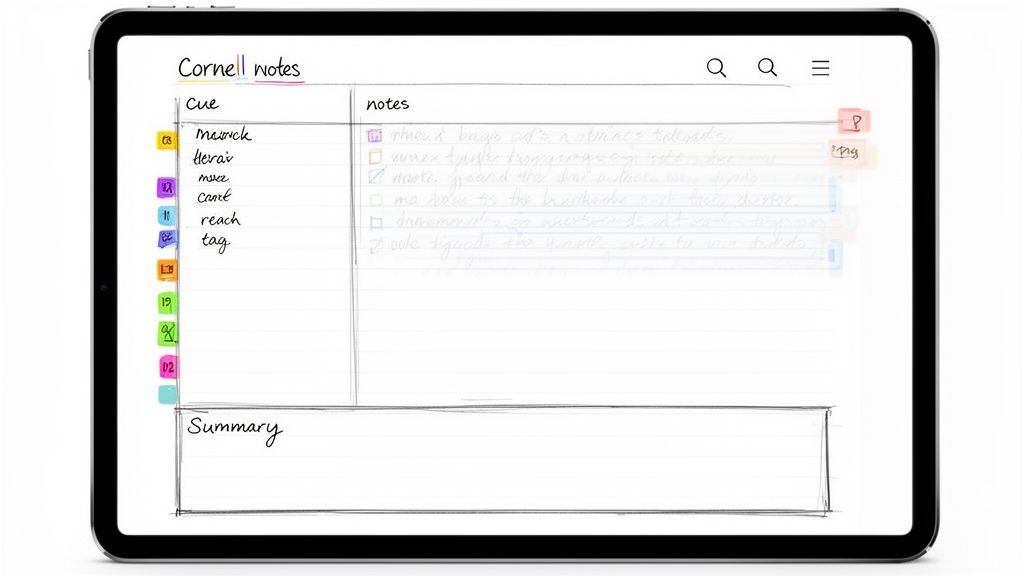
For a student, this could mean creating a custom Cornell notes template to structure lecture material. A project manager could design a weekly planner with dedicated space for priorities and action items. A researcher might create a template for literature review notes. This prep work ensures every new note starts with a clear, consistent structure — saving mental energy and keeping things organized from the start.
Turn Your Handwriting Into Searchable Text
Here's one of the biggest advantages of learning how to take notes on iPad: making your handwriting completely searchable. This technology, usually called Optical Character Recognition (OCR), works in the background of apps like GoodNotes and Notability to index every word you write. You don't have to do anything — it just happens.
The practical benefit is huge. You don't have to flip through pages trying to find that idea you had last Tuesday. Just type a keyword into the search bar, and your app pinpoints every time you wrote that word. It's like having a search engine for your own notebooks.
The real value here is how it future-proofs your notes. A random thought from six months ago isn't lost in a forgotten notebook anymore. It's right there, a quick search away, ready to be found when you need it.
Build a Filing System That Actually Works
A good digital filing system shouldn't feel like a chore. It needs to be simple enough that you actually use it, intuitive enough that you can find things quickly, and flexible enough to grow with you. The key is avoiding over-complication — use the organizational tools your app provides without creating an elaborate system you'll abandon in two weeks.
Here's a practical setup that works for most people:
- Folders for the Big Categories: Use folders for the main areas of your life. "Work," "School," "Side Projects," "Personal." This gives you a clean, high-level structure that's easy to navigate at a glance.
- Tags for Cross-Referencing: Tags add flexibility. You can tag notes with things like #MeetingNotes, #ActionItem, or #Research. A single note can have multiple tags, connecting it across different projects without duplicating the file itself.
- Color-Coding for Quick Identification: Use color to quickly spot a note's category or status. Red notebooks for urgent projects, blue for ongoing work, green for personal. Your brain processes color faster than text, so this visual cue speeds up navigation.
This combination of folders, tags, and colors creates a system that's both structured and adaptable. You get the organization of a filing cabinet with the interconnectedness of a web. Your digital workspace stays clean and efficient, even as your note collection grows into the hundreds or thousands.
Building a Workflow Across Your Devices
Your best ideas shouldn't be trapped on a single device. The real benefit of learning how to take notes on iPad comes when your work is instantly available everywhere — on your phone during a commute, your laptop at your desk, your tablet in a meeting. Building a connected system keeps your information accessible no matter where you are or what device you have handy.
The key is cloud synchronization. It's straightforward to set up. Nearly every reputable note-taking app offers syncing across devices using services like iCloud, Google Drive, or Dropbox. Enabling it is usually a single toggle in settings, but it's the most important step for a connected workflow.
Once you turn it on, every stroke of your stylus and every typed word automatically saves and updates across your entire ecosystem. This eliminates the friction of manually transferring files or emailing notes to yourself. You write something on your iPad, and it's on your Mac thirty seconds later.
Cross-Device Productivity in Practice
A synced system isn't just backup — it's about continuity. Imagine starting a rough mind map on your iPad during a brainstorming session. Later, you open that same note on your Mac to develop it further with a proper keyboard, adding research and structure. No exporting, no file transfers, no version confusion. The handoff is invisible.
Here's how this works in practice:
- Start on iPad, Finish on Mac: Use the iPad and a stylus for visual, freeform thinking. Sketch ideas, draw connections, annotate documents. Then move to a laptop or desktop for heavy typing and formatting when you need to turn those ideas into polished documents.
- Review on Your Phone: Pull up lecture notes or meeting minutes on your phone for a quick review while you're waiting in line or commuting. The same notes, the same highlights, available in your pocket.
- Collaborate in Real Time: Share a direct link to a notebook with a colleague, allowing them to see your updates as you make them. No cumbersome exports, no outdated versions floating around in email threads.
This connected approach transforms your notes from static documents into a living system. Your information follows you, ready when you need it, on whatever device makes sense at the moment.
Exporting and Sharing Your Work
Beyond your personal devices, you need ways to share your notes with others who aren't using the same app. Modern note apps handle this well. With a few taps, you can export a single page or an entire notebook as a universal format like PDF.
This works well for sending annotated lecture slides to a study group, delivering marked-up contracts to a client, or sharing meeting notes with your team. Many apps preserve your highlights and handwritten comments in the export, so the context travels with the document.
Setting up automatic backups to a cloud service like Dropbox or OneDrive also provides a safety net. It protects your library of notes from accidental deletion or device failure — peace of mind that costs nothing but a few minutes of setup. For anyone who needs both portability and typing power, you can learn more about the best wireless tablet keyboards in our 2026 guide.
Practical Productivity Hacks for Daily Use
Learning how to take notes on iPad isn't just about replacing paper — it's about working smarter. With a few adjustments to your routine, your iPad can become a central hub for capturing and organizing information, whether you're a student with a full course load or a professional bouncing between meetings.
The right techniques compound over time. Small workflow improvements add up, making a noticeable difference in how much you get done and how easily you can find information later.
For Students
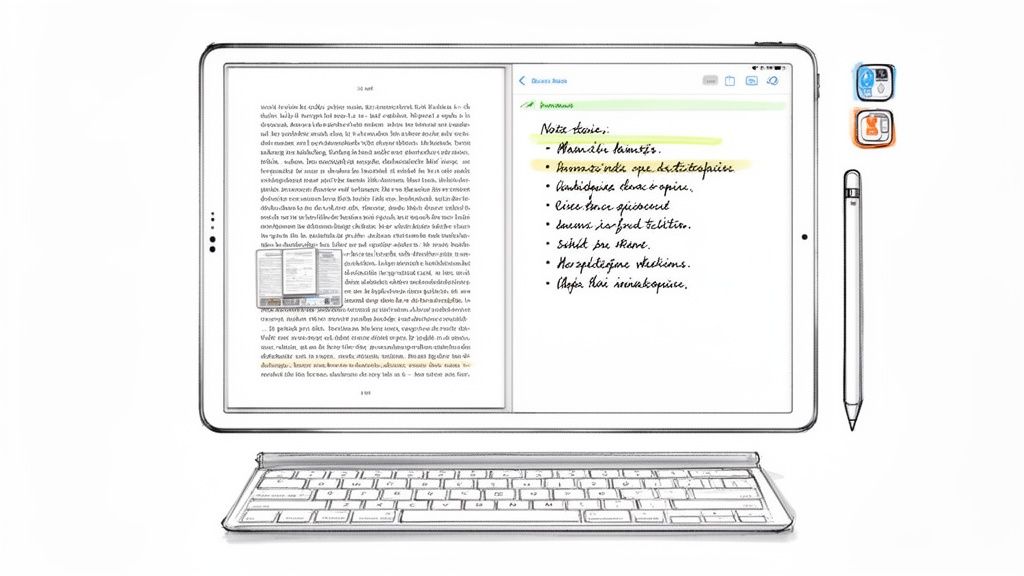
Multitasking is where the iPad shines for academic work. Instead of constantly switching between windows, use Split View to keep your digital textbook open on one side and your note-taking app on the other. This setup lets you read, highlight, and write notes without losing your place or breaking concentration.
Here's a technique worth trying: apps like Notability and GoodNotes let you record audio while you write. Hit record when your lecture starts, and your handwritten notes sync to the timestamped audio. When you're reviewing later, tap on any note to hear exactly what the professor was saying at that moment. This is particularly useful for complex topics where you might miss something while writing, or for classes where the professor speaks quickly.
Other student-specific tips:
- Import syllabi and course outlines as PDFs at the start of each semester. Annotate them as deadlines approach and assignments get clarified.
- Create a template for each class with the course name, date field, and your preferred layout. Starting from a template saves setup time every lecture.
- Use different pen colors strategically — one for main notes, another for questions to ask later, a third for connections to other material.
For Professionals
In professional settings, speed and organization matter most. Before your next meeting, import the PDF agenda directly into your note app. As the discussion unfolds, mark it up in real time — highlight action items, add comments next to relevant points, note who's responsible for what. This keeps all meeting-related information in one organized, shareable document instead of scattered across paper notes and memory.
Brainstorming sessions work differently on iPad than on paper. A stylus like the Tinymoose Pencil Pro is well-suited for creating visual mind maps — its precision lets you draw connections between ideas, add quick sketches, and reorganize thoughts spatially. This visual approach often surfaces insights that linear typing misses.
Additional professional tips:
- Create a "Daily Notes" notebook with one page per day. Quick reference for what you discussed, decided, and need to follow up on.
- Use the search function aggressively. Don't spend time organizing everything perfectly — just make sure you can search for it later.
- Set up keyboard shortcuts in your note app for common actions like creating new pages, switching tools, or inserting timestamps.
For Creatives
Artists, writers, and designers often need flexibility that structured note-taking doesn't provide. The iPad handles this well — you can switch between a blank canvas for sketching and lined pages for writing without changing apps or devices.
For visual thinkers:
- Use infinite canvas apps like Concepts or FreeForm when you need space to spread out ideas without page boundaries.
- Keep a visual reference library — screenshot inspiration, import reference images, and annotate them with notes about what caught your attention.
- Sketch thumbnails before committing to larger projects. The iPad makes iteration fast and low-stakes.
For writers:
- Handwrite first drafts if you find typing leads to self-editing too early. Many writers find longhand frees up their thinking.
- Use split screen with research on one side and your draft on the other.
- Export to your main writing app (like Scrivener or Ulysses) once you've developed ideas enough to start structuring them formally.
Quick Tips for Everyone
Regardless of how you use your iPad for notes, these habits help:
- Learn your app's gestures. Most note apps have swipe shortcuts for undo, redo, tool switching, and navigation. Spending ten minutes learning these saves hours over time.
- Review weekly. Set aside ten minutes each week to move notes into proper folders, add tags, and delete things you no longer need. Prevents buildup and keeps your system usable.
- Back up before major updates. When iOS or your note app pushes a major update, make sure your notes are backed up first. Rare, but sync issues do happen.
- Don't over-organize. A simple system you actually use beats an elaborate system you abandon. Start minimal and add structure only when you feel the need.
At Tinymoose, we build tools for people who use their iPads to get real work done. The Pencil Pro 2 gives you palm rejection, tilt sensitivity, and a natural writing feel — the features that matter for comfortable, productive note-taking sessions.
Share:
Best Wireless Keyboard for iPad: What to Look For
USB-C Apple Pencil Alternative: Same Features, Half the Price